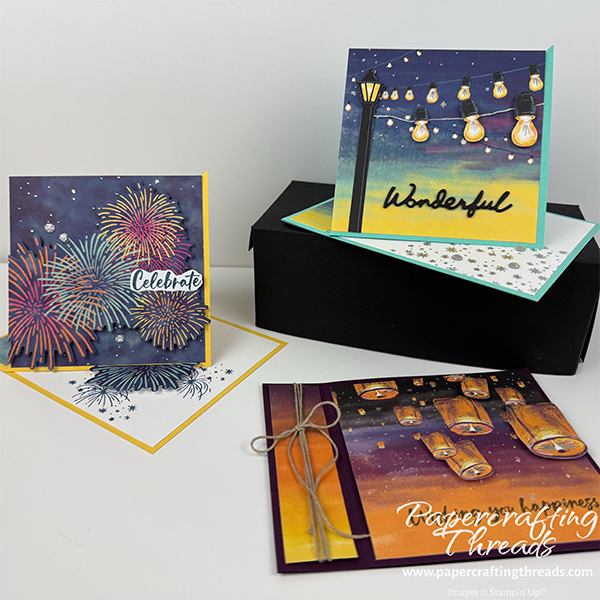
Create three different Twisted Easel cards to celebrate all things summery! With color drenched skies and twinkly elements to light up the night, it’s hard to pick a favorite. And that floating lantern scene reminds me of a certain movie. So let’s get started!
cutting & scoring guide
| Paper Dimensions | Score Short Side | Score Long Side | ||||
| 4¼” x 11″ Coastal Cabana cardstock base | 4¼” & 5½” | |||||
| 4″ x 4″ Basic White cardstock for liner | ||||||
| 4″ x 4″ patterned paper for focal point on front | ||||||
| 1″ x 4″ patterned paper for side panel | ||||||
| Scrap of Basic Black for diecutting sentiment |
step by step instructions
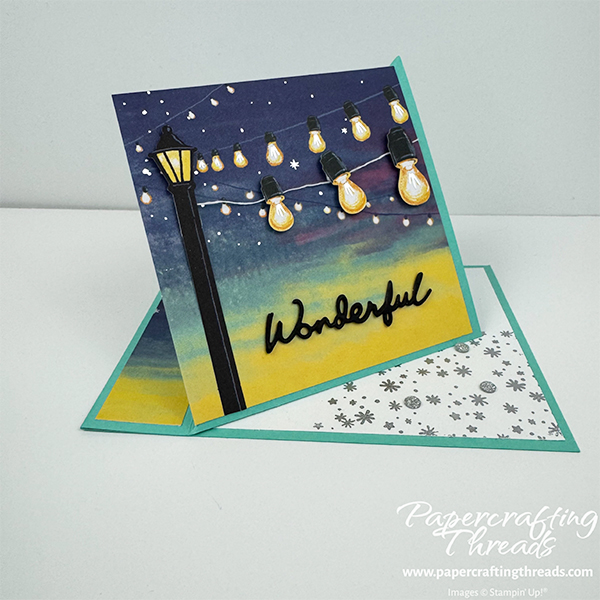
I’m making the lightbulb version of the Twisted Easel cards shown in the photo above. The basic instructions are the same for all three cards, the only difference being in how each card was decorated. I used the contents of the Sparkling Celebrations May 2026 Paper Pumpkin kit for all three.
Cut and score the card base as noted above. Fold the 5½” scoreline as a mountain fold. Then fold the 4¼” scoreline as a valley fold. Place the 4¼” section in the paper trimmer track with the top right corner lined up in the center. Pivot the bottom section until the lower right portion of the 4¼” scoreline is also in the track and score on the diagonal. Mountain fold the diagonal and set aside.

Stamping the Twisted Easel Card
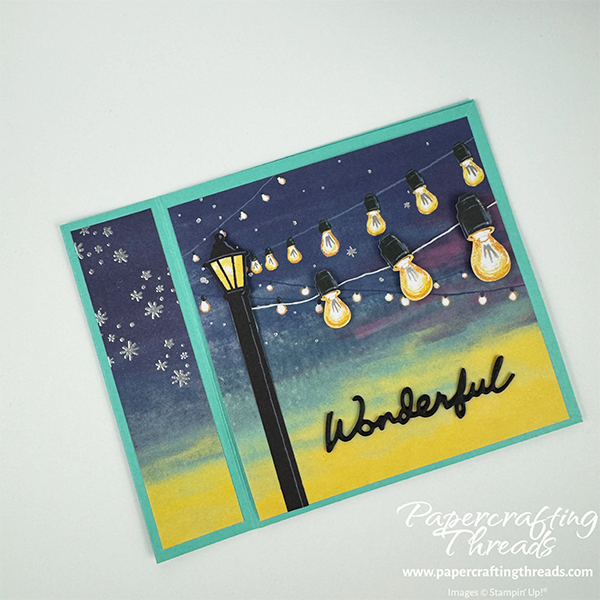
Ink the sparkles/stars stamp from the kit with Versamark ink and stamp across the lower right of the Basic White liner diagonally (see finished photo). As I couldn’t quite see where the images had been stamped, I tried to stamp in a diagonal line. Sprinkle with silver WOW embossing powder. Stamp a second diagonal line of sprinkles/stars, and sprinkle again with the embossing powder. Stamp any remaining open spots and add embossing powder. Heat set. PRO TIP: If the cardstock starts to curl, heat from the bottom and the cardstock will flatten out.
Stamp and heat set the sprinkles/stars on the top third of the narrow 1″ strip cut from one of the envelopes in the kit.
If you are finding this tutorial helpful, consider a contribution to my coffee fund ☕️ Coffee → Creativity → Content → More Coffee (help fuel the cycle!)
Final Decorating of the twisted Easel Card
Cut one of the card bases from the kit down to 4″ x 4″ as shown. Take a length of white baker’s twine and separate the strands, leaving just one. Gently straighten the strand with your fingers, or run the length over the edge of something like the barrel of the Take Your Pick tool.
Apply two Mini Dimensionals™️ to the back of the lamp portion of the light post from the kit. Then apply a short strip of Tear and Tape just below that. Remove the backing and stick one end of the thread on the tape. Apply a second short strip over the top of the thread to hold it securely in place. Cut off ¼” from the bottom of the lamp post. Add a little bit of glue to the remaining bottom section of the lamp post and adhere to the printed sky scene as shown.
Run the thread around the back of the square and adhere with Tear and Tape. Apply mini dimensionals to the back of the three graduated sizes of light bulbs from the kit. Add to scene along the thread line.
Returning to the card base, adhere the Basic White liner on the inside panel. Adhere the bookbind panel together. On the front of the card, adhere the narrow strip to the left panel. Add liquid glue to the bottom right triangle, keeping close to the scoreline but leaving space on the right and bottom sides. Adhere the lightbulb sky scene.
Then add a piece of double-sided adhesive to one side of a scrap of Basic Black cardstock. Diecut the word “Wonderful” from the Beautiful Blooms Add-on die set three times. Remove the backings and stack one on top of another, creating a word embellishment. Remove the last backing and stick to the front of the card.
Add a self-adhesive gem on the inside of the card to act as a stopper to hold the twisted easel up for display. And lastly, add two more gems for decoration.
Two More Versions of the Twisted Easel Card
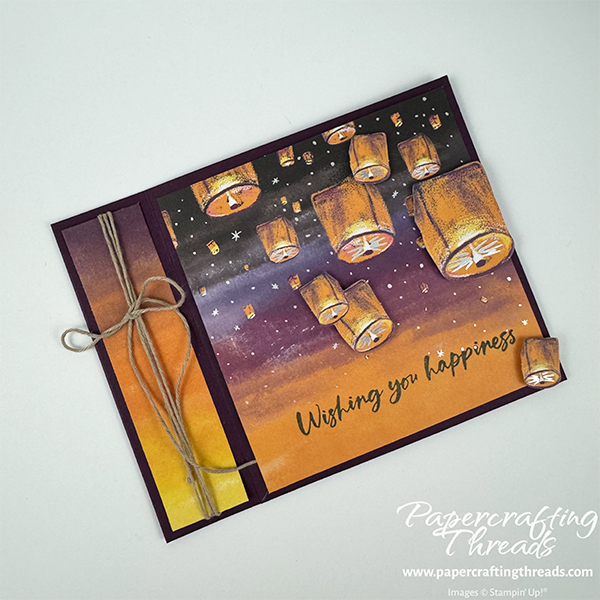
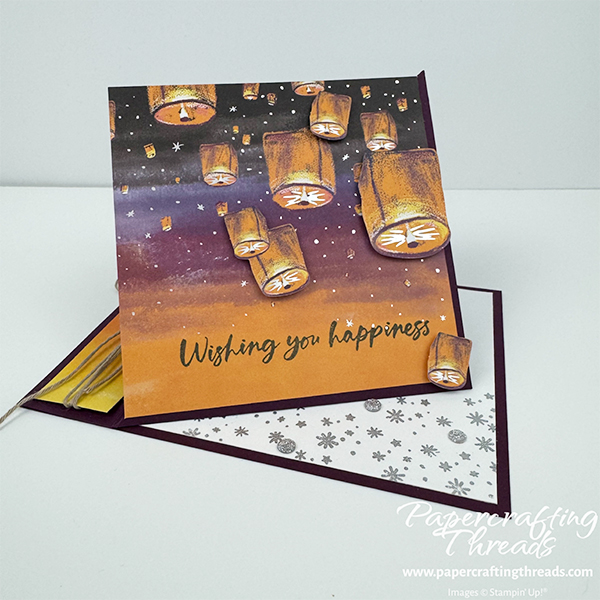
I made two more versions of this card using each of the card bases from the kit. First up is the floating lantern card – hello Tangled!
The base is Blackberry Bliss. I used a length of linen thread and wrapped it around the 1″ strip, then tied a bow around the strands before adhering to the side panel. The greeting was stamped in Misty Moonlight ink directly on the patterned paper. And the small lantern on the bottom right corner is covering up a stray bit of ink. I created the inside in the same manner as the lightbulb version, except the stopper was moved over because of that low lantern.
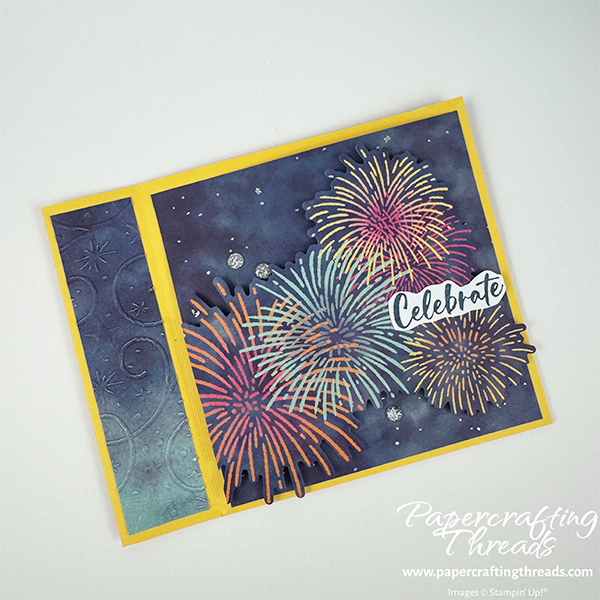
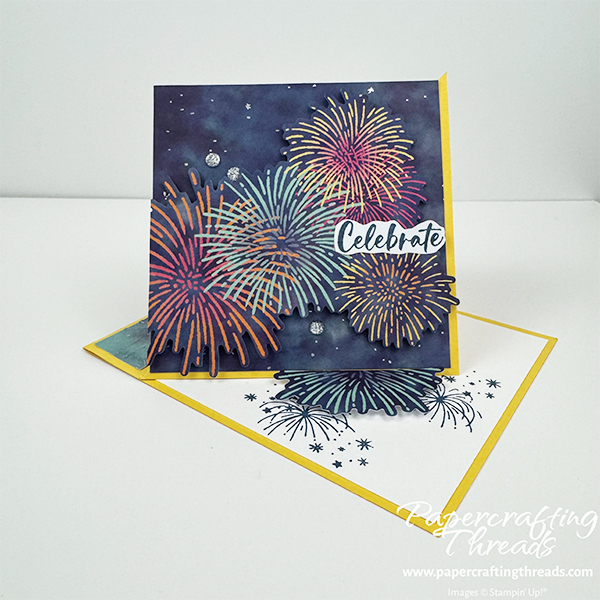
The third card has a base of Daffodil Delight. I embossed the narrow strip with a brand new embossing folder available in July – Swirls of Magic. Pop up the die cut fireworks on dimensionals. Stamp the sentiment in Misty Moonlight ink on a scrap of white from the kit and fussy cut.
I stamped the inside liner with the fireworks image and the sprinkles/stars in Misty Moonlight. Then I used the partial firework die from the kit as the stopper.
Which version is your favorite? I love taking the contents of the Paper Pumpkin kits and challenging myself to come up with new ways to use them. The kit is a great affordable way to get a new stamp set each month as well as all the bits and bobs. And when you’re in a time crunch to get a card done and in the mail, the suggested ways of putting the cards together is a huge perk.
Sign up for a future Paper Pumpkin kit here in my online store – and watch for my alternatives.

Leave a Reply