Overloaded with scraps of ¼” pieces of cardstock and bits of patterned paper? I have the perfect project to put those scraps to use. Let’s get started!
cutting & scoring guide
| Paper Dimensions | Score Short Side | Score Long Side | ||||
| 5½” x 8½” Pool Party cardstock base | 4¼” | |||||
| 4″ x 5¼” Basic White cardstock for liner | ||||||
| 4″ x 5¼” patterned paper for assembly layer (will be hidden) | ||||||
| 2¼” wide x 3″ tall Painted Illusions patterned paper | ||||||
| 1″ wide x 2″ tall Painted Illusions patterned paper | ||||||
| 2¾” wide x 2″ tall Painted Illusions patterned paper | ||||||
| 1½” wide x 1¾” tall Thoughtful Journey patterned paper | ||||||
| 1½” wide x 1″ tall Thoughtful Journey patterned paper | ||||||
| ¼” wide scrap strips of Pretty Peacock cardstock for separators | ||||||
| Scraps of Basic White for stamping puppies, diecutting butterflies and sentiment strip |
step by step instructions
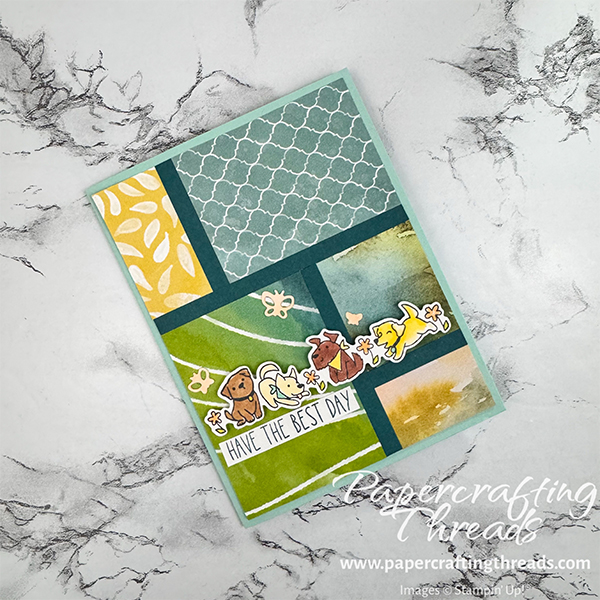
Cut cardstock and DSP as described above. I combined scraps of Painted Illusions and Thoughtful Journey using the blue/green/yellow pieces. Note the orientation if pattern is directional.
Use any pattern DSP as a base (I chose my least favorite pattern from Painted Illusions). I then began adhering the small pieces of DSP in a clockwise direction with multipurpose liquid glue.
I started in the lower left corner with the largest piece of DSP, and aligned the left and bottom edges with the base DSP.
Next I ran a glue line just above the top edge of my first piece and extending the full width of the base piece. Press and adhere the longest strip of ¼” wide Pretty Peacock, butting the bottom edge with the top of patterned paper in the left corner.
Then I adhered the top left corner rectangle, again aligning the edges and butting the bottom up with the strip of Pretty Peacock. I laid a vertical glue line to the right of the just-adhered DSP and placed my next strip of Pretty Peacock. Feel free to flip over and trim off any excess Pretty Peacock as that length might be just perfect for the next edging.
Adhere the top right corner piece. Then adhere another strip of Pretty Peacock along the right side of the very first corner piece. Next comes the middle right patterned piece. Adhere the last strip of Pretty Peacock. And finally the lower right corner patterned piece.
Flip the base over and use the edge to cut off any excess Pretty Peacock and any of the patterned papers that aren’t aligned.
Adhere to the front of the Pool Party cardstock base folded in half.
decorating
Stamp your choice of animals from the Cutest Crew stamp set, and color in with Stampin’ Blends. Die cut, pop up on dimensionals and add to card front as shown.
Stamp the sentiment in Pretty Peacock ink on a scrap of Basic White, trim close to the wording, and adhere below the line of critters.
Die cut the butterfly images twice from scrap Basic White. Use a Blending Brush to add Petal Pink ink. Adhere one set of butterfly shapes to the other set, creating custom embellishments. Adhere to card front with multipurpose liquid glue.
Stamp paw prints or butterflies or bird feet along the right edge of the Basic White card liner. Adhere to inside of card base.
If you found this tutorial helpful, consider a contribution to my coffee fund ☕️ Coffee → Creativity → Content → More Coffee (help fuel the cycle!)

Leave a Reply