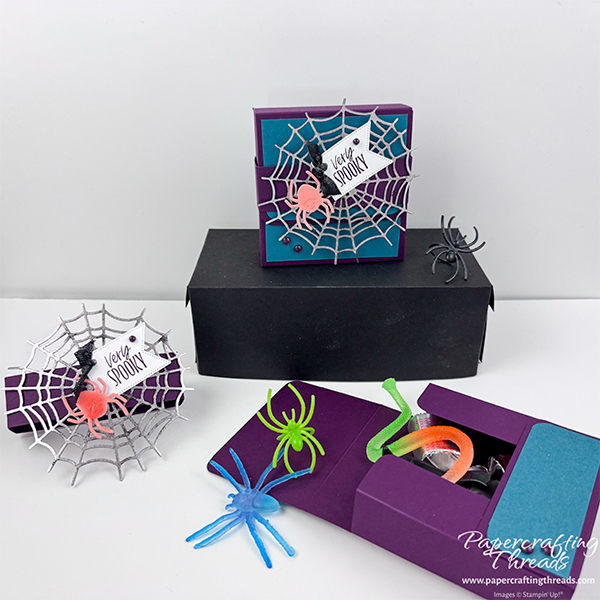
Spoil those goblin and ghoul trick-or-treaters with this Hot Foil Trick or Treat Box! The box comes together quickly after some scoring and cutting. Then I share a Hot Foil trick that embeds shiny foil into the surface and edges of a die cut spider web. Fill with candy and buggy treats and it’s ready for giving. So let’s get started!
cutting & scoring guide
| Paper Dimensions | Score Short Side | Score Long Side | ||||
| 7½” x 9½” Blackberry Bliss cardstock for box | 1″, 2″, 5½” & 6½” | 1½”, 2½”, 6″ & 7″ | ||||
| 1″ x 10″ Blackberry Bliss cardstock for belly band | 2″ | |||||
| 2¼” x 3¼” Pretty Peacock cardstock for upper flap | ||||||
| 1¼” x 3¼” Pretty Peacock cardstock for lower flap | ||||||
| Scrap of Basic White cardstock for label | ||||||
| Scrap of Basic Black for die cutting web | ||||||
| Scrap of Crisp Cantaloupe cardstock for die cutting spider |
step by step instructions
When cutting the Blackberry Bliss cardstock for the base, cut the 7½” mark first, as this will leave a 1″ x 11½” strip that can be cut down to 10″. Remove the shaded areas by cutting off the scorelines. Cut on the red lines. The newly created tab can be mitered if preferred. I like to miter as it reduces the bulk.
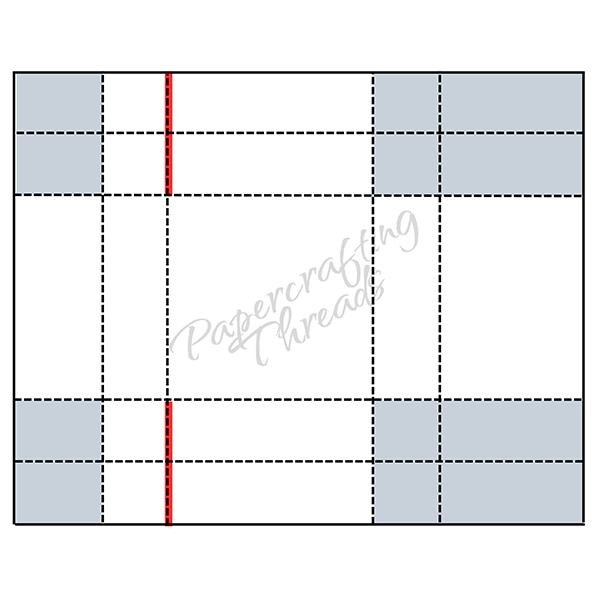
Round the corners as indicated in the template below. Round the corresponding corners of the Pretty Peacock cardstock before adhering on the back side as noted below.
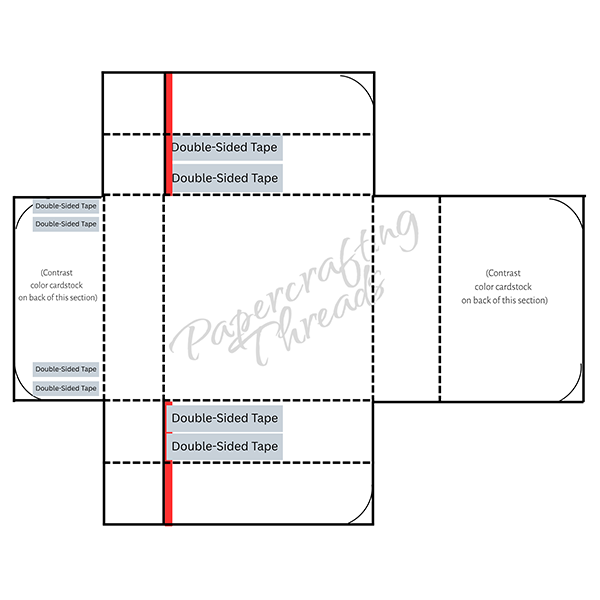
Add Tear & Tape as shown. NOTE: the tape near the red lines should not be longer than the two tabs. Fold all scorelines as valley folds. Remove the liners on the side sections. Pull the two-square tab inwards and square up the corners, creating the box’s lower corners. Press to adhere.
Remove the liners from the double-sided tape on the bottom flap, folding the flap up until the revealed tape meets the inner sides created earlier. Press firmly to adhere.
Die cut the spider web from the Web of Fun bundle in Basic Black cardstock. Stamp the sentiment in Blackberry Bliss ink on scrap of Basic White cardstock and die cut with label. And die cut the spider from Crisp Cantaloupe. Place the spider on a silicone craft mat and flood the surface with the Fine Tip glue pen. Let dry for a shiny hard shell.
hot foil trick(s)
Heat up the Hot Foil machine as directed by the manufacturer’s insert. If you have a Reverse Foil plate, use it. I don’t have it — I decided to save money and use something I already had. Instead, I use the back of the Buffalo Check Hot Foil Die (use any hot foil plate with a large enough surface to cover the cut die). Place this die face down on the heating surface when the yellow light flashes. Once the green light lights up, wait an extra minute or two. Place the silver foil pretty side down against the heated plate. Then place the die cut spider web face down in the center of the foil. Add a piece of plain white copy paper that covers the foil area completely. Press down gently on the magnetic power cord and remove it. Add the green hot foil shim and the clear hot foil spacer. Carefully pick up the entire sandwich and slowly run it through the Cut & Emboss machine.
Remove the top to plates and the copy paper. Then peel back the foil to reveal the hot foiled web. The hot foil embeds into the die cut and almost wraps around the edges for a really cool look!
decorating the Hot Foil Trick or Treat Box
If you are finding this tutorial helpful, consider a contribution to my coffee fund ☕️ Coffee → Creativity → Content → More Coffee (help fuel the cycle!)
Add treats to the box (and it holds quite a bit!) Wrap the belly band horizontally around the closed box and adhere one end over the other with liquid glue. Trim any excess.
Add liquid glue in small dots on the back of the foiled web, staying within the first inner circle. Adhere over the center of the belly band.
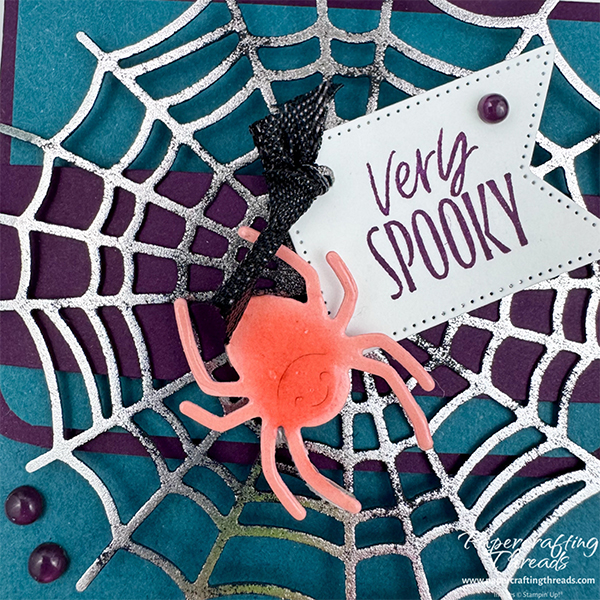
Punch a small hole in the top left corner of the stamped banner, thread a small length of Black ⅜” Iridescent Ribbon through the hold and tie in a knot. Adhere over web with mini glue dots.
And finally, adhere the hard shelled spider with a mini dimensional. Scatter dot embellishments on the box and label if desired.
Need a Visual for the Hot Foil Trick or Treat Box?
I’ve recorded and posted a video tutorial for this project and included two cards so you can get the most out of the Web of Fun bundle.

Leave a Reply