Meet the fabulous Slap Top or Hinged Fun Fold Card! I don’t know why, but it reminds me of those slap bracelets used for kids’ party favors. It’s also an easy and fast fun fold. So let’s get started!
cutting & scoring guide
| Paper Dimensions | Score Short Side | Score Long Side | ||||
| 5½ x 8½” Crumb Cake cardstock base | 4¼” | |||||
| 2⅞” x 5⅜” Crumb Cake cardstock flap | ½” | |||||
| 2⅞” x 4⅜” Crumb Cake cardstock mat | ||||||
| 4⅛” x 5⅜” Basic White cardstock for embossed layer | ||||||
| 4⅛” x 5⅜” Basic White cardstock for liner | ||||||
| 2¾” x 4¼” Basic White cardstock for inner message | ||||||
| Scrap of Basic White cardstock for die cutting & sentiment | ||||||
| 2¾” x 4⅞” Delicate Dreams DSP for focal point on flap front |
step by step instructions
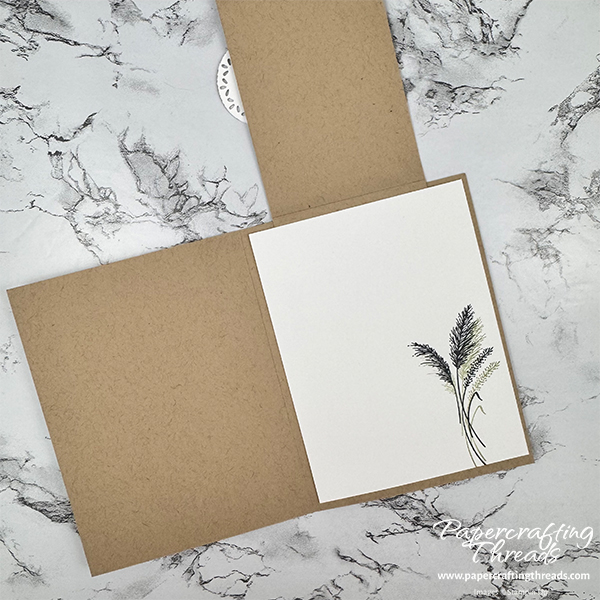
I used the Delicate Wishes and the Fabulous Sayings stamp sets for my sample. Stamp the ‘wheat’ image from Delicate Wishes in Secret Sea ink on the lower right corner of the Basic White liner. Make a matching envelope at the same time by inking and stamping the wheat again on the lower left corner of the envelope. Stamp the image again in second generation Old Olive ink, slightly offset from the Secret Sea image, on both the liner and envelope.
Shorten a Too Long Sentiment
Ink the word ‘happy’ from Fabulous Sayings in Secret Sea ink and stamp at the top center of the Basic White 2¾” x 4¼” cardstock. Clean the stamp and double check the photopolymer is dry. Then ink the word ‘birthday’ from the same stamp in Secret Sea ink and stamp just below the first word.
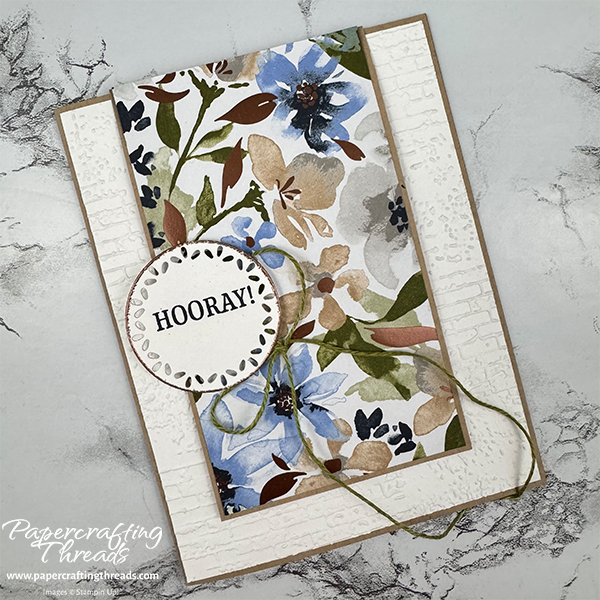
Stamp the single flower image in Secret Sea ink below the greeting. Stamp ‘HOORAY’ in Secret Sea on the scrap of Basic White and die cut with the 1⅝” circle from the Spotlight on Nature die set.
Create a New Color with Stampin’ Blends
Color in the flower with Hydrangea Hue Stampin’ Blends. Don’t have that color? Create it by coloring a layer of Light Fresh Freesia over an individual petal. Then overlay it with two coatings of Dark Balmy Blue. NOTE: add the layers in this order, since the Fresh Freesia is a lighter color than the Balmy Blue. (Thank you to Alisa Tilsner for this color combination!)
Color the small leaves with Light Mossy Meadow and the larger leaf with Light Crumb Cake. Add an extra layer of Light Crumb Cake to just a portion of the large leaf for easy shading. Use a heat tool for 5-8 seconds to make sure the ink is dry.
Embossing Techniques
I wrote a whole post on these next two techniques. You can check that out here. But in a nutshell…
Go over the center of the flower and the sprig of ‘wheat’ with the tip of a juicy ballpoint pen (any color/any brand). Quickly pour copper embossing powder over the image, tap off any excess and heat set. Great way to craft on a budget with standard office supplies!!
Roll the edges of the greeting circle in Versamark ink. Sprinkle with copper embossing powder and heat set for a gilded edge.
If you are finding this tutorial helpful, consider a contribution to my coffee fund ☕️ Coffee → Creativity → Content → More Coffee (help fuel the cycle!)
Assembly of the Slap Top or Hinged Fun Fold Card
Fold and burnish the Crumb Cake cardstock base on the scoreline. Place a strip of Tear & Tape adhesive along the ½” tab on the Crumb Cake flap piece of cardstock. Remove the liner and center the flap on the inside back of the card base. The fold line should be positioned just slightly above the top edge of the card base. Check that the front left flap can be folded in with the slap top folded over the top. Adjust if necessary before burnishing the ½” flap to the card base.
Flip the slap top up and out of the way, then adhere the liner inside the card base, covering the ½” flap. Close the front of the card. Close the slap top. Adhere the Delicate Dreams DSP on the front of the slap top, aligning the top edge with the flap and an equal border around the remaining three sides.
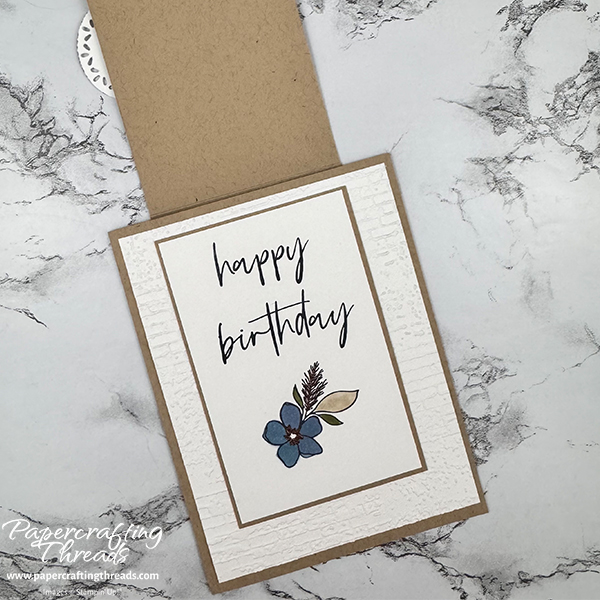
Emboss the Basic White cardstock with the Exposed Brick embossing folder and adhere with liquid glue to the front of the card base. Adhere the happy birthday panel to the Crumb Cake mat. Then use the slap top as a guide to adhere this panel to the embossed panel, making sure the edges do not peek out from below the slap top.
Finish Decorating
Attach two dimensionals on the back right side of the ‘hooray’ circle. Remove the liners and adhere to the left side of the slap top with a portion of the circle extending past the left edge. Tie a large floppy bow from Old Olive twine. Adhere with a rolled up glue dot tucked towards the bottom right of the raised circle.
More of a visual learner? I’ve got you covered with a video over on my You-Tube channel! Plus learn how I fixed my assembly mistake.

Leave a Reply