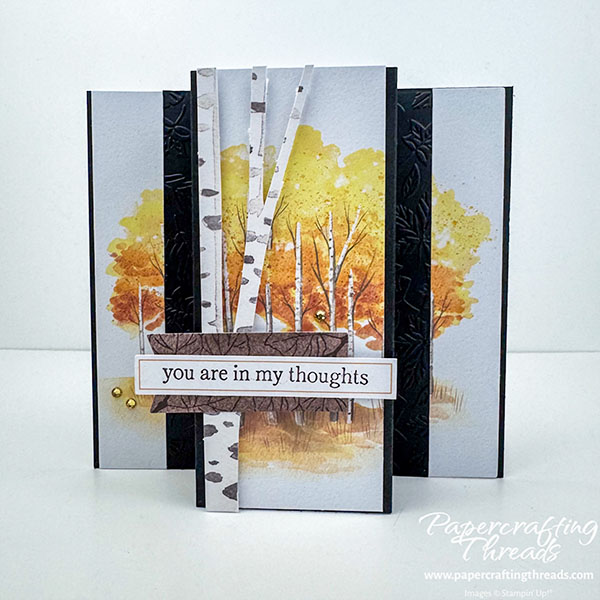
A few scorelines are all that’s needed to create this Triple Panel Standing Card! I love the simplicity of this fun fold, and how the folds really let the scenic paper shine. A bit of leafy embossing and some dimensionals add loads of depth. So let’s get started!
cutting & scoring guide
| Paper Dimensions | Score Short Side | Score Long Side | ||||
| 5½” x 8½” Basic Black cardstock base | 1⅞” & 3″ from both ends | |||||
| ⅞” x 5½” Basic Black cardstock for embossing (cut 4) | ||||||
| ⅝” x 5½” Basic Black cardstock for embossing (cut 2) | ||||||
| 2¼” x 5½” scenic center panel | ||||||
| 1″ x 5½” scenic side panels (cut 2) | ||||||
| ⅝” x 5½” patterned paper for back panels (cut 2) | ||||||
| 2¼” x 5½” Basic White cardstock for liner |
step by step instructions
For my card, I used one of the card bases from the Aspens of Gratitude Paper Pumpkin Kit to create the scenic front panels. Any scenic patterned paper works beautifully for this style of card. Cut 1″ off the right front panel. Flip the card base upside down and cut at 2¼”, forming the center panel. Slide the base over 1″ and cut the remaining panel.
Use the tree trunk frame from the kit and separate the left tree from the frame, following the trunk edges.
Cut all of the Basic Black cardstock as noted in the table. Emboss all six of the narrow panels with the leaf-patterned embossing folder from the Seasonal Cheer triple embossing folder pack.
Cut the two back panels from either the dark brown wood grain pattern of Country Woods DSP, the brown pattern from Beautiful Gallery DSP, or the leftover section of card base from the kit. Randomly stamp the leaf trio image from the kit in Early Espresso ink over the panels. And stamp the same leaves on the flagged brown wood panel from the kit.
Stamp the leaf trio image from the kit in Early Espresso ink on the lower right corner of the Basic White panel. Color in the leaves with the Light Golden Glow Stampin’ Blend, leaving bits of white space for interest.
Stamp the sentiment on one of the narrow banners from the kit.
Assembly of the Triple Panel Standing Card
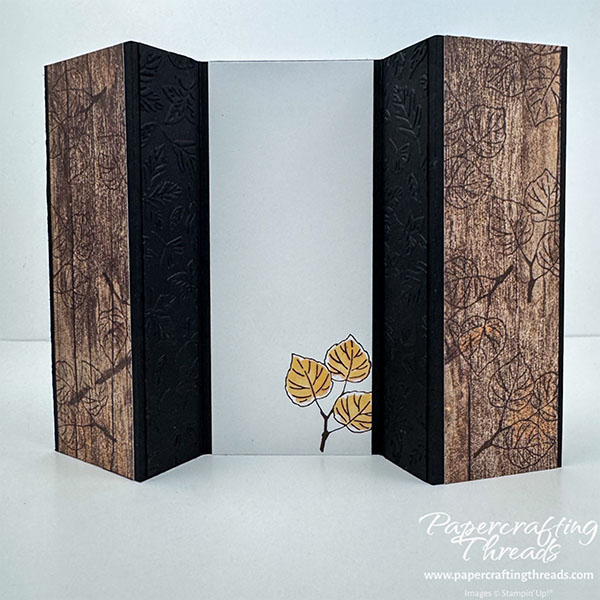
Valley fold the two outer scorelines on opposite ends of the card base, and mountain fold the two inner scorelines. Flip the card base over and decorate the back first. Adhere the two brown wood-pattern strips on the outermost panels, lining up the top and bottom edges and leaving equal space on the sides. Then place two of the ⅞” wide black embossed strips on the next set of panels. And finally, adhere the white liner in the middle section.
On the front of the card, adhere the two remaining ⅞” wide black embossed strips on the panels on each side of the center panel. Adhere the left and right scenic panels on the outermost panels, leaving an ⅛” border on the outer edges. Place the two narrow ⅝” strips butted up next to each of the scenic side panels. Then adhere the center scenic panel.
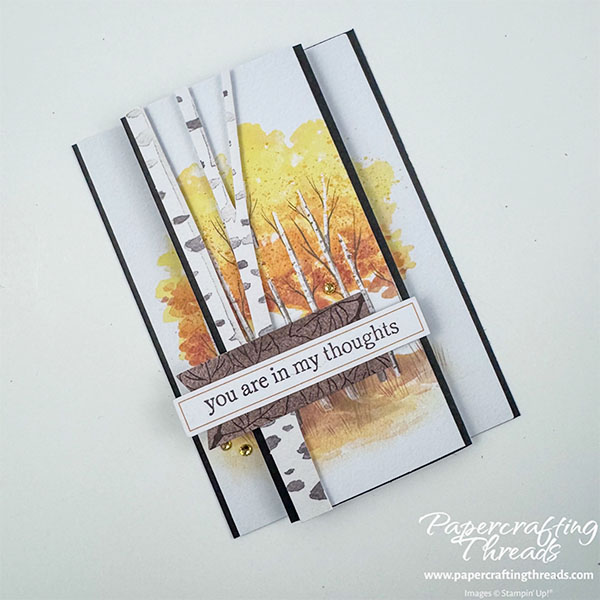
Add dimensional strips cut from the sheet of dimensionals to the back of the tree trunk branches and line it up along the left edge of the center panel.
If you are finding this tutorial helpful, consider a contribution to my coffee fund ☕️ Coffee → Creativity → Content → More Coffee (help fuel the cycle!)
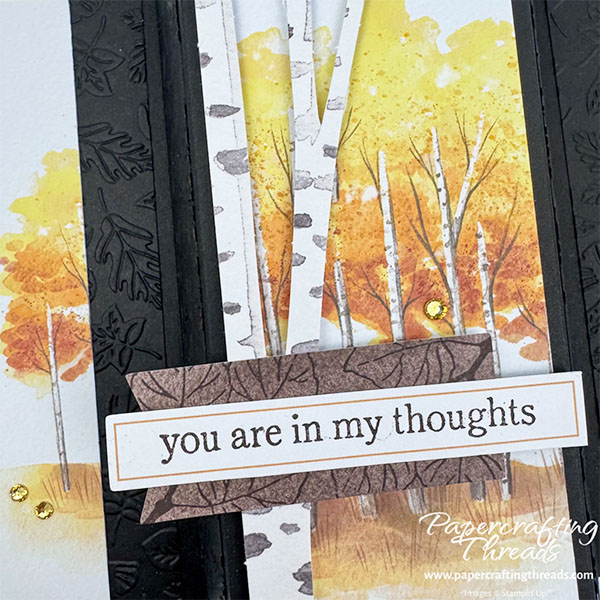
Adhere the flagged banner over the tree trunk with dimensionals on the back right side and a bit of glue on the trunk. Center the sentiment over the banner and adhere. Scatter gems from the kit on the front of the card.
Missing out on Paper Pumpkin? The kits just keep getting better and better! Subscribe to next month’s kit by visiting my online store. Closing date for next month’s kit is always the 10th of the month. So to get October’s kit, purchase your subscription by October 10th. Purchase month-to-month, or blocks months, cancel anytime and satisfaction guaranteed. Then watch for my alternative projects and get more out of your kit!

Leave a Reply